

By Joshua Waddles
18 March 2023 – Updated 4 Jan 2026
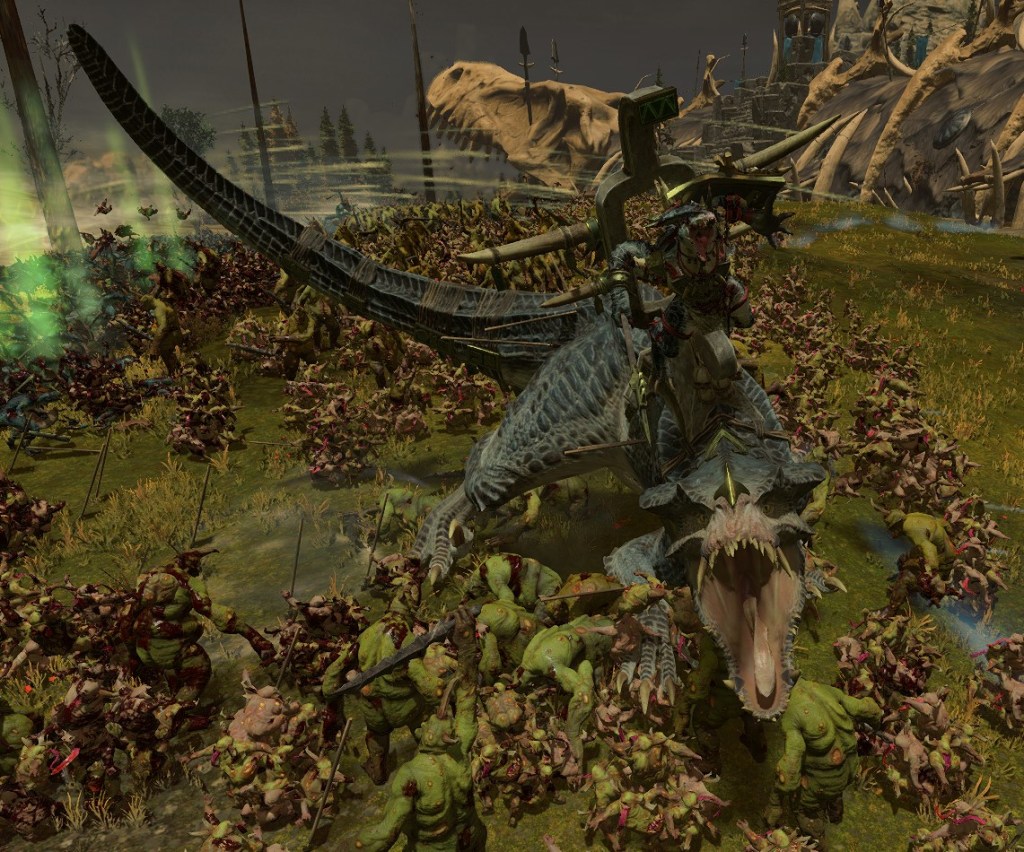
Have you been feeling depressed lately? If you have, odds are that put you in the mood to share the love of Grandfather Nurgle.
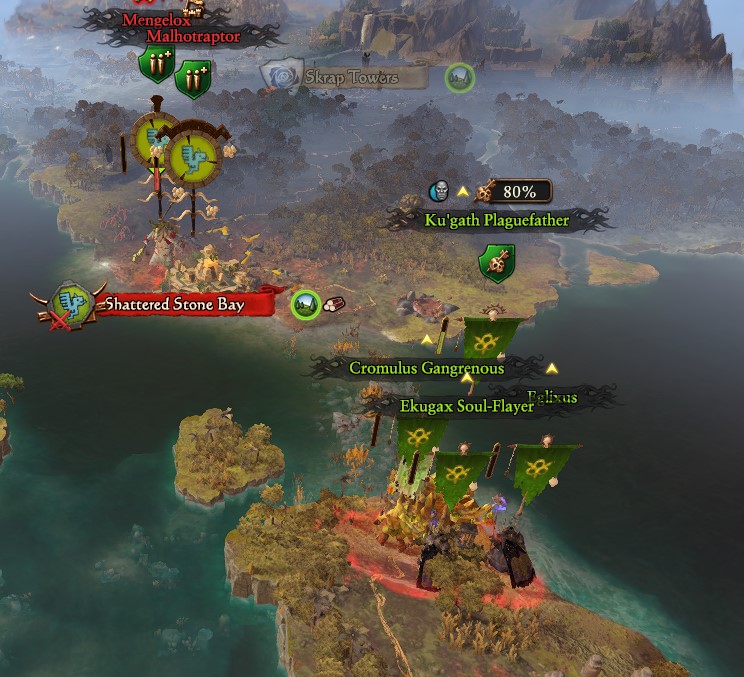
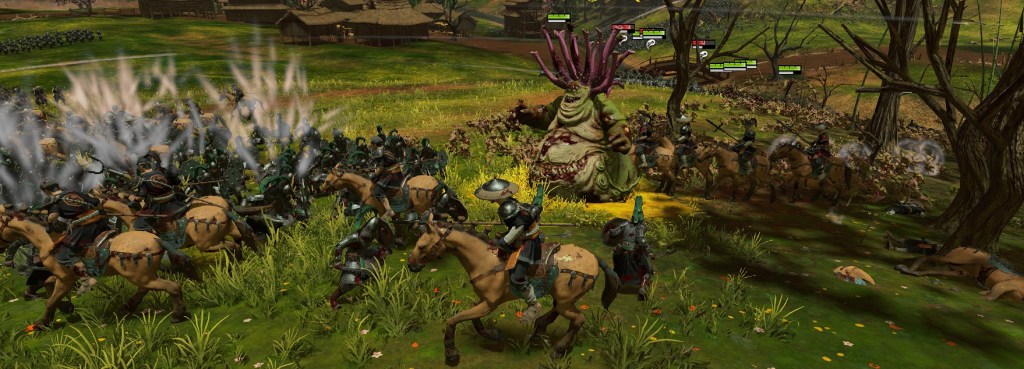
Our dear friend Ku’gath has got a seemingly nice start location too. An island all to himself (after he deals with some NPC lizards) with no neighbors to your southern or eastern border. The ogres to the west are unlikely to get in the water also, so really all you have to do is advance north from there. But once you do, you encounter one huuuuuuuge problem.

Just when you were starting to feel good about yourself!
Well don’t give up yet, my brother in Nurgle. If you follow the strategy guide below, you can lay Ghorst flat on his back. And you won’t even need a cattle prod.
Table of Contents
Turn 1
In Dragon Fang Mount, get Cultist Camp (Medicine) for hero capacity later, but don’t upgrade the unique building, Sea Dragon’s Teeth. You’re going to need that $4,000, so save that for later. As for your research, definitely get Favorite Children first. You’ll be relying heavily on your Nurglings until you can start spamming heroes.
First Battle
You could just auto resolve these first two battles without hurting your units too much, but you get more infections if you fight the first one manually.
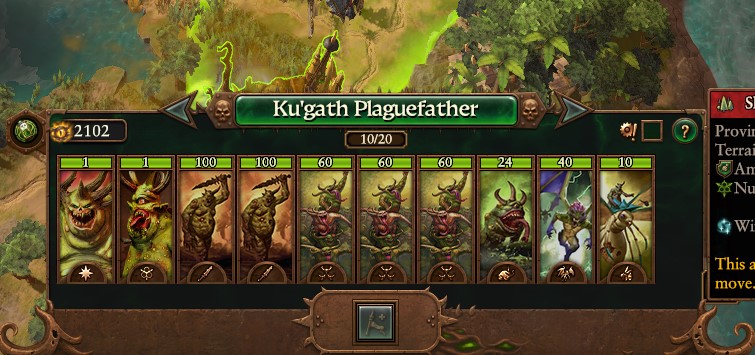
Put Ku’Gath in Channeling Stance and embed your Plagueridden. Now your starting army should consist of Ku’gath, one Plague Ridden, two Plague Bearers, three Nurglings, one unit of Furies, one unit of Plague Drones of Nurgle (Death’s Heads) and one unit of Plague Toads of Nurgle (which shall henceforth be referred to as “Froggies”).
The first enemy lord is a Saurus Oldblood with Saurus Warriors, Saurus Spears and three Skink Skirmishers. Don’t underestimate the skinks; your army is neither armored nor shielded, so shut them down quickly or they’ll shred your front line.
The map has a nice little hill to set up on. Try to position your Nurglings to take the brunt of the damage, since they heal a lot faster than Plague Bearers.
Put Ku’Gath and the Plague Ridden up there behind your melee infantry, but hide your Froggies in the trees where they can get at the enemy from behind. Put your Deaths Heads and Furies next to the Froggies. They can’t hide but the lizards will focus on the main army. Put your Deaths Heads in melee mode and use your fast units (Death’s Heads, Furies, Froggies) to isolate and pin down the skirmishers. Try and avoid the Saurus infantry and especially the Oldblood. The closer the army is to your melee infantry, the more likely they’ll charge at your Nurglings or Plaguebearers instead of turning around to save their Skirmishers. You can usually pull your fast units out of melee if they do get the melee infantry’s attention, but that gives the Skirmishers an opportunity to shoot them while they’re running away.
It’s no big deal if your Death’s Heads or Furies get killed. Your Death’s Heads are too expensive and your Furies don’t help much. Protect your Froggies, though. They’re pretty handy.
The Oldblood is very tanky, so don’t bother trying to take him out quickly. Cast Miasma of Pestilence to take the power out of his punch, then focus on killing the other units until they get the army losses penalty. After he’s shattered, you can pin him down with some Nurglings while Ku’gath and the Plagueridden chop him down, letting the rest of your army chase the remaining Saurus (Sauri?) and Skinks.
After the battle choose Incubate Captives as a reward, since you’re going to want the infections. Then put Ku’gath’s first point into Hard to Hit. Ignore Ku’gath’s magic line for now, the Plagueridden can fill that role. Your goal for Ku’gath’s skill set is Pestilent Decay. You’re unlikely to reach this goal before your battle with Ghorst (especially since you’re going to detour off of that skill line as more immediately useful abilities become available), but you’ve still got Cathay and the Ogres to think about after you’re done with him.
For your Plagueridden, put the point into Miasma of Pestilence. The next four points for him should go into Stream of Corruption, then Children of Nurgle. Get Evasion after that and then Blight Boil. Fleshy Abundance can wait until you’ve got more single-entity units, just be very careful not to let your lords and heroes take too much damage before the fight with Ghorst.
Don’t disband your Death’s Heads (yet) if they haven’t died already. You can still use them in the next battle.
Second Battle
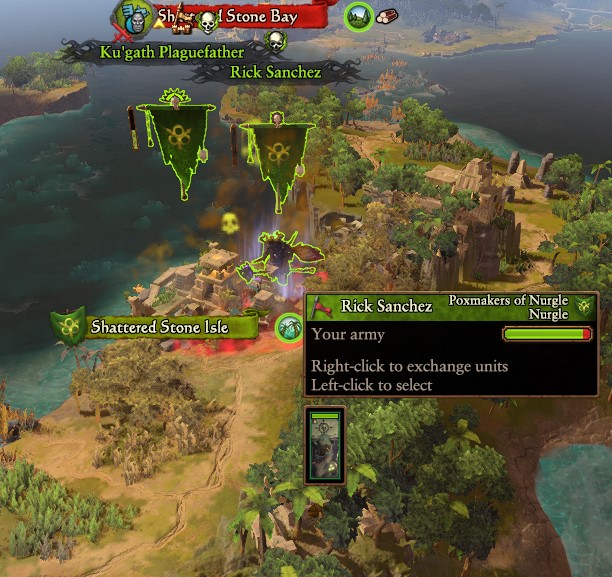
This is the battle of Shattered Stone Isle. There’s little reason not to autoresolve this one. Siege battles give very few infections regardless of whether or not you fight them manually. But if you do choose to fight it, you can use the same strategy as the first. This time it’ll be a bit easier since there’s no Saurus units or that Oldblood.
If you lost any of your fast units, you can use Ku’Gath to shoot the Skink Cohorts (Javelins) at a distance. Hopefully this will break at least one of them before they get too close. And if you still have your Froggies, you can sometimes use them to pin down multiple Cohorts at once, or you can send Nurglings after them. Nurglings won’t catch Skinks, but at least the Cohorts can’t shoot at you if they’re too busy running way.
Post Battle
Occupy the city and disband your Death’s Heads. They’re good but they also cost 390 upkeep per turn. That’s almost 200 more than a Plague Beast, which is a lot better. So recruit that guy as well as all six Nurglings currently in your recruitment pool.
Now, although it may seem early, it’s best to recruit your second lord. You don’t actually need him in the next few battles, but you’ve got to get him leveled up as quickly as possible to help you deal with Ghorst. At this point you need a Chaos Sorcerer Lord and the lore of magic you want is Death. It’s true Death magic is not as good as Lore of Nurgle in general, but Spirit Leach is excellent against single-entity units. Soulblight, which reduces enemy armor, base weapon damage and armor piercing damage, is also very useful. Both of these spells are going to be very important, not only against Ghorst but also for your inevitable war with Cathay later on.
This plague spreading cheese explained here is optional, but very helpful.
Now select Ku’gath and open your Plague Cauldron. Infect Ku’gath with Palsy. It’s important that you infect Ku’gath instead of your other lord, because infecting Ku’gath costs 25 infections. Infecting your generic lord will cost 50.
Now transfer one of your units from Ku’gath to your new lord. If you do this with your Plagueridden, there’s a small chance he’ll gain an experience point. But the main reason you’re doing this is because by transferring a unit, you also infect the new lord with the same plague you infected Ku’gath with. By spreading a plague as much as possible, you unlock new symptoms for that plague.
Now transfer your Plagueridden back to Ku’gath. This usually spreads the plague again. With Ku’gath and one other lord, you can do this up to three times before it stops working. You’ll find that transferring a unit often spreads the plague to both lords at once, so it counts double.
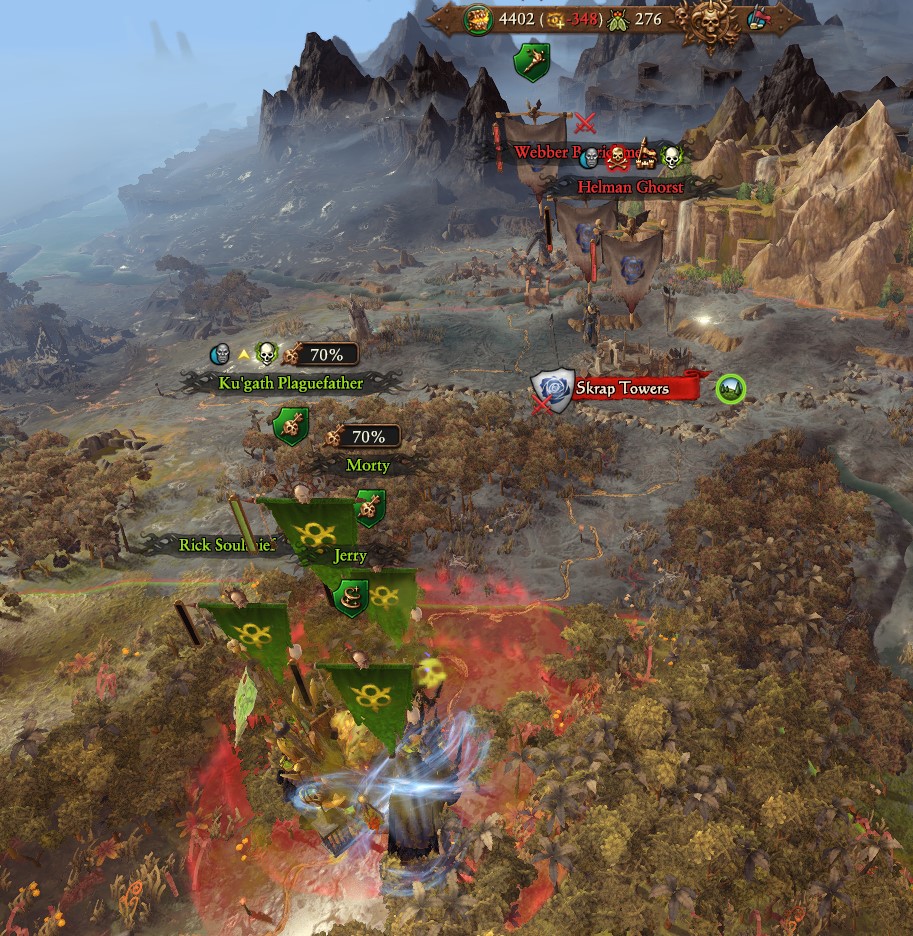
Important Notes on Plagues and Ghorst
You might have heard that Ghorst is immune to plague, but that is not strictly true. Ghorst, at least when played by the AI, takes plague debuffs and attrition just like everyone else. This could be an oversight by Creative Assembly, since Ghorst’s character description reads that he is immune to plague attrition.

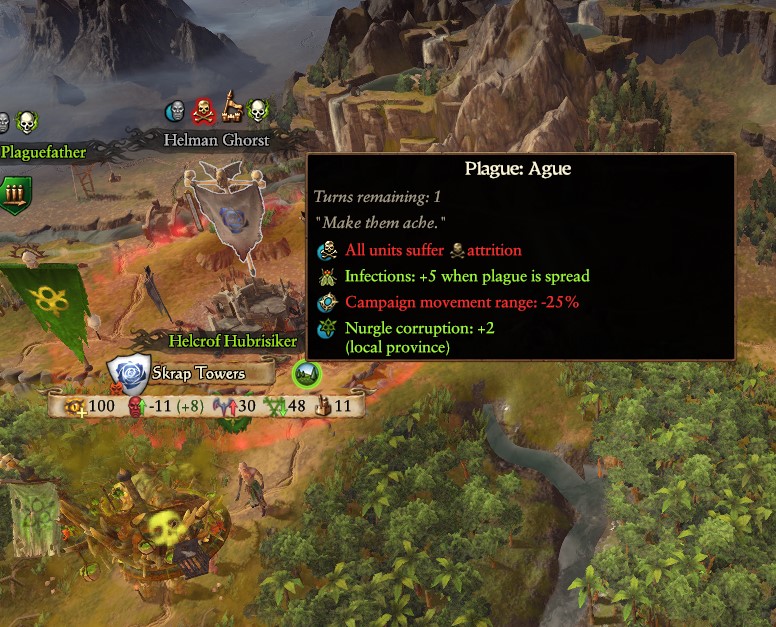
There is an important thing to note about plagues, though. However long the plague lasts (two turns at this point) that does not include the entirety of the last end turn. So let’s say Ghorst is sitting in Skrap Towers with one turn left on his Agua plague. Unless you’re ready to attack him now, you need to hit him with another Agua before you end the turn. Because although it says he’s still taking attrition for another turn, the plague will expire after Ghorst ends his turn and he’ll have replenished before the start of your next turn. This is assuming he doesn’t do something else that’ll make him take attrition.
Turn 2
There’s an important step which is easy to forget. Before you move your lords toward Dread Rock, put them into channeling stance. The extra Winds adds up every time you end a turn in channeling stance. Your other two lords probably don’t have to rush on that, but Ku’gath will be spending a lot of time in ambush stance later on (if you use the safe strategy), so it’s important to build up his Winds of Magic reserves as best you can.
Move toward Dread Rock but leave your lords with a little bit of movement range. You’re going to spread Plague again. So open the Cauldron and once again infect Ku’gath with Palsy. He still has Palsy, but you need to infect him again if you want to spread it effectively. Don’t add any symptoms; that will only waste infections at this point.
Note: You have the option of skipping the plague cheese and getting to Shattered Stone Bay one turn sooner, which is helpful if you want to rush Ghorst. If you’re confident in your ability to defeat Ghorst after he’s suffered Agua attrition for a few turns, you don’t necessarily need the Palsy symptoms.
Now recruit another Chaos Sorcerer Lord of Death at Shattered Stone Isle and end the turn.

Turn 3

The lord you just recruited can reach Dread Rock on forced march, so bring your Chaos Sorcerer Lords into range and launch the attack with Ku’gath (who is a siege attacker).
Dread Rock is not at all a difficult battle, but it does present a cheesing opportunity you’d might as well take advantage of. First of all, the two northern gates do not have towers. Secondly, there’s a long barrier inside the city dividing the western gate from the east for the city defenders, but not for you. So if you start the battle with your army in front of one gate, you can simply rush to the other gate and find it nearly undefended.
Note: if you start at the west gate and run toward the east, there’s a certain tree that one of your Chaos Sorcerer Lords or your Plagueridden will always get stuck at. It seems the collider is a bit off and your units are unable to detect that. If you don’t notice what happened, they’ll send the entire battle just jogging in place.
Occupy the city (Don’t loot and occupy because you need Dreadrock to reach level 2 quickly) and level up your lords and Plagueridden. For Ku’gath you’re still rushing Pestilent Decay (although go ahead and grab Nurgling Tide and Plague Shield once those two skills are unlocked). For your Plagueridden you’re still rushing Stream of Corruption and Blight Boil. But for your Chaos Sorcerer Lords you’ll want to put your first two points into Spirit Leach and the second two into Soulblight.
You probably won’t have enough movement to make the most effective use of the plague spreading cheese, so skip that for now and end the turn.
Turn 4
Here’s where your strategy differs from that of nearly any other campaign. Your first instinct is probably to rush Shattered Stone Bay before their army can build up and then try to rush Ghorst. Which you can do, but you’ll beat him a lot easier if you hold back a bit and unlock Palsy symptoms.
Go ahead and let Tepok’s Spawn recruit. They’re only getting Skinks. The real danger is in the single-entity units they’ve already got up there.
Before you go anywhere, infect Ku’gath with Palsy again. Now you’re going to transfer your Plagueridden, but it’s important that you do it to a different lord each time. For example. If you have Ku’gath transfer a unit to Rick Sanchez and just go back and forth between those two, you can only do it three times, and then you won’t be able to spread the plague to Morty. But if you go Ku’gath -> Rick -> Morty and then back to Ku’gath in rotation, you can do it up to six times. There is some RNG involved and you won’t necessarily get that high a number.
You might not have a lot of movement after you do this, but that’s fine for now. Get into channeling stance and just get as close to Shattered Stone Isle as you can.
For your next research, get Spore Diffusion for growth. Don’t upgrade your Cultist Building (Medicine). The “Capacity +1” means in total, not in addition to the capacity you already gained from the level 1 building. So save your money to upgrade Dread Rock next turn.
Turn 5
Upgrade Dread Rock to level 2. This is key, because once that settlements gets up to level 2 it unlocks recruitment for Exalted Heroes of Nurgle. With your Cultist Building (Medicine) plus the upgraded capital, you’ll have capacity for two Exalted Heroes. That’s going to make a world of difference in your fight against Ghorst, if you choose not to rush him before you can embed them into your army.
Get your lords closer to the rock bridge leading to Shattered Stone Bay. Keep them in channeling stance if you can but go ahead and force march any who are too far behind. Just make sure they stay in reinforcement range, the lizards are going to attack soon.
Turn 6
Get Highly Infectious for research, then get everyone close to the chokepoint at the top of the island. Keep your lords close enough to reinforce each other and then end the turn. In channeling stance if movement range allows.
What Tepok’s Spawn does next is the same as what they’ve done in every test campaign. They send their one full stack after you, even though autoresolve gives you a Pyrrhic Victory, and they do not send their other lord to reinforce. Ku’gath does not have to be in ambush stance for them to do this. (If this behavior ever changes, simply placing Ku’gath or some of the other lords in ambush stance will probably separate them).
You’re best off taking the autoresolve victory. You don’t lose any units even if one of your lords is out of reinforcement range. If you fight it manually, the Saurus Scar Veteran will surely wipe out at least a few of your units.
It’s wildly random how many infections you’re offered as a reward after this auto-resolve victory; the game might offer you anywhere from 20 infections to 750. It’s a bit of a judgment call, but you are going to need at least 200 infections to summon the Plague Cultist with Palsy (plus symptoms) before your battle with Ghorst. If the game offers you more than 70 infections, you’re probably better off taking that. If not, you’ll want to try to catch Topek’s other army outside of Shattered Stone Bay somewhere around turn 10 if you can. You get infinitesimal amounts of infections from winning siege battles, no matter how big the enemy army is.
Note: The Cultist you summon from the Plague Cauldron menu is not the same as the Cultists you recruit. A Plague Cauldron Cultist does not count toward your Cultist unit capacity, but it also cannot be embedded into an army, nor perform a normal Cultist’s hero actions. It can only be used to spread plague and scout. A Plague Cauldron Cultist also still costs upkeep.
The Safe Way, The Kinda Safe Way or Rush Ghorst?
You’ve got a couple of options in what you might do at this point. Some players like to get into the water and go after the Thunderguts, leaving Shattered Stone Bay as it is. You could also occupy Shattered Stone Bay and try to rush Ghorst. The safest way is to just stay where you are for a few turns, farming the lizards and using the movement to unlock more Palsy symptoms until you’re able to embed your two new Exalted Heroes of Nurgle into your army. If you’re confident in your ability to rush Ghorst, though, this would be most effecient. Especially since Ghorst doesn’t start with a Mortis Engine anymore, and that makes him a lot easier to beat.
Rush Ghorst
You wanna go straight after The Caravan of Roses? Alrighty, then.
This requires that you did everything almost perfectly up until this point. By now you should have three Chaos Sorcerer Lords and a Plague Beast to help Ku’gath.
There are also two points of luck which may help you: if you got a lot of infections fighting Tepok’s Spawn and if Ghorst has not yet occupied Skrap Towers. He usually does this pretty early, but if you’re in place at the start of Turn 7 (or 6 if you disregarded the Palsy symptom cheese), you might have just enough time.
If Ghorst Hasn’t Yet Occupied Scrap Towers
Ideally, you’re going to want at least 400 infections to rush Ghorst. But you can do it with 200 if you’re able to get him alone and forgo the symptoms.
Take one of your Chaos Sorcerer Lords and get him as close to Scrap Towers as you can (safely, you don’t want him to get killed in a surprise attack.) Then select that lord and summon a Plague Cultist infected with Agua. That Plague Cultist will have full movement range (let us all pray CA never nerfs that), so he can go the rest of the way to find Ghorst.

If you hit Ghorst with Agua before he attacks Skrap Towers, he can’t replenish from the damage he takes during the fight with the Skaven there. And he might take quite a bit.

Now use the Ku’gath and the rest of your guys to attack Shattered Stone Bay. Do your very best to take as little damage as possible. What damage you do take, let your Nurglings soak it up. Your single-entity units have got to be in mint condition to fight Ghorst and his Mortis Engine, and your Nurglings heal much faster anyway.
Occupy Shattered Stone Bay so you can get replenishment. Go ahead and get your other lords closer to Skrap Towers if you can, but be wary and give yourself room to retreat if Ghorst launches a surprise attack. Recruit as many extra units as you can afford and end the turn.
You should be on Turn 8. Ku’gath (or whichever lord you used to occupy Shattered Stone Bay) won’t have enough movement range to initiate the attack, but they will have enough range to reinforce. If you’re at really good health and Ghorst doesn’t have a second army with him, you can launch the attack now. The garrison at Skrap Towers is pitiful, just a few extra low-level units. Remember to hit him with Palsy before you do, along with symptoms to reduce attack and defense.
But if he’s got another army close by, which is likely (he may even have two) you’re going to want to use bait-and-bleed tactics here. Hit Ghorst with another Agua and keep your armies at the very edge of Ghorst’s (or his other armies’) movement range so you can retreat if you have to.
You’re advised to put Ku’gath in ambush stance, so Ghorst sends one of his secondary armies instead of attacking you himself. You can probably win if he walks into an ambush set by one of your other lords, but you’ll be badly hurt afterwards. So it’s best to pick off his other armies first.
If he’s got more than one army and you have to retreat, things can get complicated. But at least all of these armies will be taking attrition while they’re in your territory. Reset your ambush trap and try to pick his smaller armies off first. Get infections from each victory and definitely hit Ghorst with another Agua, just in case he retreats to Scrap Towers to try to heal.
Once you do get Ghorst by himself, hit him with Palsy and symptoms (you should have enough infections after fighting his armies) and take him out.
Your Campaign Post Ghorst

You can finally breath a little bit! From now on there’s much more wiggle-room in how you spend your money, but you’re still in for quite a bit of a grind. For one thing, you’re probably at war with someone else by now, either The Thunderguts or the Ogre Kingdoms. This is going to set up a reoccurring theme for the rest of this campaign: enemies coming at you from all angles while you’re trying to deal with something else. Fortunately, Ku’gath has an advantage in terms of scouting. You can use your summoned Cultists to keep an eye on what the other folks are doing while you’re trying to expand.
Slow and steady wins the race with Ku’gath. You’ll be tempted to expand quickly, grabbing as much territory as you can. But if you do it that way, enemies are going to pop out from the mountain passes and snatch up your cities. For this reason, you’re going to need two effective armies pretty quick. Early on, it’s probably best to embed your heroes with your Chaos Sorcerer Lord while giving Ku’gath a Nurgling stack, along with the two new Plagueriddens.(one of Nurgle, one with the Lore of Death). Unlocking Champions of Decay in Ku’gath’s skill set will allow you to have a total of three Plagueriddens, so give him the new two and put your leveled up Plagueridden with whichever Chaos Sorcerer Lord you choose to keep. Blight Boil is especially useful with single-entity unit spam.
Unless you’ve been very unlucky, you probably haven’t met Miao Ying or Zhao Ming yet. For this reason, you might let Ghorst keep Gnobblar Gorge as his only city, since that provides a buffer between you and Cathay. Some players rush Cathay to try and prevent them from leveling up and producing elite units. This is a good plan, but Ku’gath is especially weak early game. You might be better off leveling up on Ogres while you build up your plagues and add more heroes.
Dealing with Ogres
You’ll find the Ogres much less of a pain to deal with than Ghorst. One thing you’ll want to watch out for, however, is their skirmisher units. You’ll likely have to deal with the Ogres long before you’re able to send out a single-entity unit doomstack. So use your fast units to shut down their skirmishers before they can turn your Nurglings into pincushions.
Blight Boil can also be useful in dealing with Ogre skirmishers if there’s a unit you can’t quite reach. A well-placed Boil can pretty much delete Knobblar Trappers. Ogre Bulls are more resistant, but Boil will still get rid of them if you make sure you’ve got enough Winds of Magic reserve. Aside from that, hold the line with your Nurglings and melee units while Ku’gath and your single-entity units focus on lords, heroes and anything else that’s giving you too much trouble.
Dealing with Greenskins
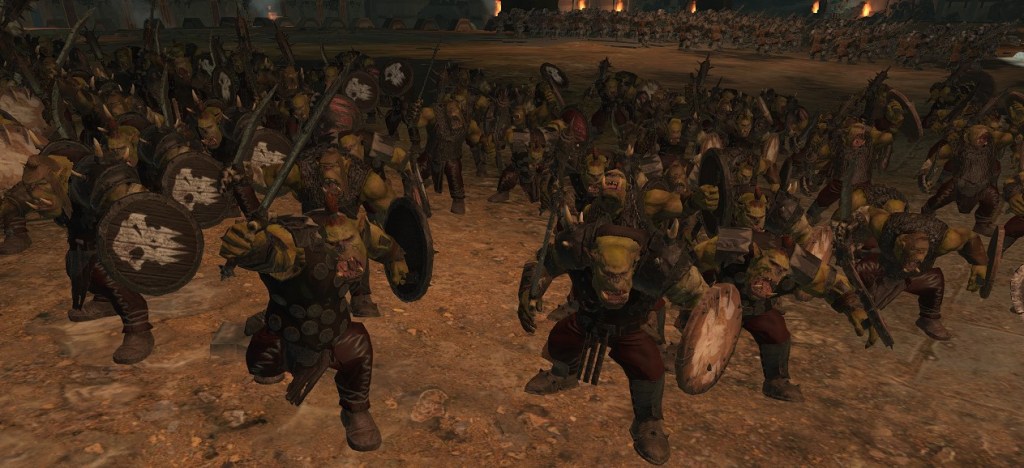
As with the Ogres, the Greenskins are a race you might have to mix it up with before you’ve gotten a fully effective hero stack.
Their low armor works to your advantage. Stream of Corruption can dish out a lot of damage to their melee line/glob. Beware their skirmishers, ranged attacks are Kryptonite for Nurglings and a lot of other melee mobs you might have serving in your army. You can shut them down with Exalted Heroes or Cultists, which should have horses by now. You can also pretty much obliterate them with Blight Boil (although there’s a chance they’ll get out of the way) or smash them with Ku’gath’s artillery attack.
You might have to fight Grimgore or possibly some other strong single-entity units such as an Aracknarok Spider. Your standard method for dealing with these sorts of units will be to cast Soulblight. This reduces their melee attack and armor (if they have any) allowing your Heroes and Cultists to carve them up. For this reason you’ll always want at least one Lore of Death spellcaster in any army.
Dealing with High Elves
In multiple test campaigns, The Knights of Caledor demanded money rather than declaring war outright. It’s probably better to just give it to them. In most cases, other enemies will happily kill the High Elves for you while you’re busy with Cathay.
If you do choose to fight them, or if they don’t give you a choice, you’re going to have to deal with dangerous single entities and some of the most dangerous archers in the game.
Spam the heck out of Plague Cultists from your Cauldron, infecting them with Agua first and then Palsy right before the attack. Palsy symptoms depend on the composition of their armies as well as yours, so don’t summon the Palsy Cultust until you’re close enough with your army to get a good look. Naturally, you’ll want to reduce ranged attack if you’ve got a lot of mobs. If you’ve got a decent single-entity spam, you’re probably better off reducing armor and melee attack.
Either way, keep Ku’gath far away from their skirmishers. And never try to take in a HE army in a fair fight. Always hit them with a plague unless you’ve got hero spam. Even then it’s probably a good idea to at least drop a Palsy on them.
Dealing with Cathay
Ho, boy. Some of these battles against Miao Ying or Zhao Ming are going to make you miss Ghorst. But at least you’ve got a lot more to hit them with by now, primarily in the way of plagues.
If you’re low on infections for whatever reason, you probably want to save your Plague Cultists for any army led by Miao Ying or Zhao Ming. In a faction already dangerous for you, the Dragons take any Cathain army to the next level. But you can take a lot of the power out of their punch with Agua and/or Palsy (plus extra symptoms). Ague is a good plague to hit them with if you expect a couple of turns before you have to fight them. It’s always best to let them take attrition if you can, then hit them with Plague (plus symptoms) immediately before you initiate the attack.
It’ll be easy as cake if you’re fighting them with a hero spam army, but that’s probably not going to be the case. Since so many of the capacity-increasing resource buildings are in Cathay, you probably are going to have to fight them with mixed armies. At least at first.
When fighting against either Ying or Ming, it’s usually much easier to focus on decimating their army until you get the army losses penalty than it is to try and snipe the lord. The Dragons are extra tanky, plus they can just fly away if they get into trouble. But if you’ve used Palsy effectively, at least that mitigates the damage they can do. They may wipe out a unit of Nurglings or two, but just keep your irreplaceable units out of their path until you shatter the army, then you can surround the Dragon while he/she is running away and take her out of the equation for a few turns.
In any Cathayan army which does not include either Miao Ying or Zhao Ming, you’ll find the situation much easier to deal with. Unless they have Terracotta Sentinels. These things are nearly as bad to deal with than Ying or Ming. They’re unbreakable, so they won’t run away just because everyone else does; they smash through infantry mobs like bulls through a Cathay shop, and there might be two to four of them in a single army.
Spirit Leach is your friend here. Especially since these Terracotta Sentinels will often surround themselves with infantry mobs, making it extra difficult for your heroes to engage them in melee.
You’re also going to have to deal with a lot of artillery and skirmishers, so you need at least enough heroes to shut those down before they completely destroy your infantry mobs.
Dealing with Dwarfs

By the time you have to worry about the Dwarfs you’ll probably have nearly invincible hero stacks, but they could still give you some problems, particularly if you draw them for the end game crisis.
The main thing you’ll need to pay attention to are the legendary lords. Generic lords won’t be an issue, but Dwarfish legendary lords are very tanky, even against hero spam, and they hit very hard. Make sure you have at least one spellcaster with the Lore of Death. Isolate the lord if you can. Use Soulblight to keep his armor and damage low while your heroes all team up on him, adding Spirit Leach as Winds of Magic allow.
Also be wary if the Irondrakes. These are a flaming unit and tend to be more dangerous for your Cultists and Exalted Heroes than other skirmisher types. They fire in an arch, so they can get shots off much easier than the Thunderers, and they won’t hesitate to fire on your heroes even when they’re in the center of a glob of Dwarf units. This sounds good on paper, but it seems to damage your heroes more than the Blight Boils you’ve been casting in the center of them.
Spamming healing spells or abilities counteracts this problem well enough, but it’s best to get them locked up in melee. It’s worth pulling two or three of your heroes away from your main group to shut them down. A couple of well-placed Blight Boils will also take them out of the equation.
Don’t be scared to bring your Plagueriddens into melee if they’ve got Rot Flies to ride around on. While they are more vulnerable to damage than your Cultists and Exalted Heroes, particularly ranged damage, they’re not quite as squishy as you’d think. One Plagueridden can shut down a unit of Irondrakes for you (just be sure the rest of the Dwarf melee units are engaged elsewhere and can’t interfere) and they beat Gyrocopters in melee. Gyrocopters are a little bit faster than the Rot Fly mounts, but they often don’t run away fast enough. When they do, you can sometimes trick them into getting too close by telling your Plagueridden to fly to a point on the map close to them, rather than directly targeting them.
Dealing with Chaos Dwarfs

The best way to deal with the Chorfs is to be friends with them. The closest player faction you’l encounter is the Legion of Azgorth and they start off completely neutral toward you (Although that can vary depending on who you’ve gone to war with before you encounter them.) A small gift can slowly get them to like you more, making for an easy non-aggression pact in the future, and they can hopefully keep the Knights of Caledor distracted for you.
If you do wish (have to) fight the Legion of Azgorth, it’s best to take them out as early as you can. They start off spamming melee, mostly in the form of unarmored “laborers”. This will be a cake walk for your armies. But if you wait too long, they’ll have access to lots of devastating ranged attacks, artillery and area of effect spells. If you have to encounter mid-to-late game Chorfs, at least your army is likely to be in good shape by the time you encounter them. By this point you should have plenty of single-entity units, which do a good job at surviving missiles. Alternatively, be sure to have some cavalry units to shut down the Chorf skirmisher units, and magic is absolutely essential.
It’s not recommended that you rely too heavily on Chaos Warriors when going against the Chaos Dwarfs. While they are shielded, they’re also slow and the Chorfs live in an area with a lot of open ground. They’ll get picked off by skirmisher and artillery units if you don’t have some way of shutting down the enemies ranged capability.
Dealing with Kislev
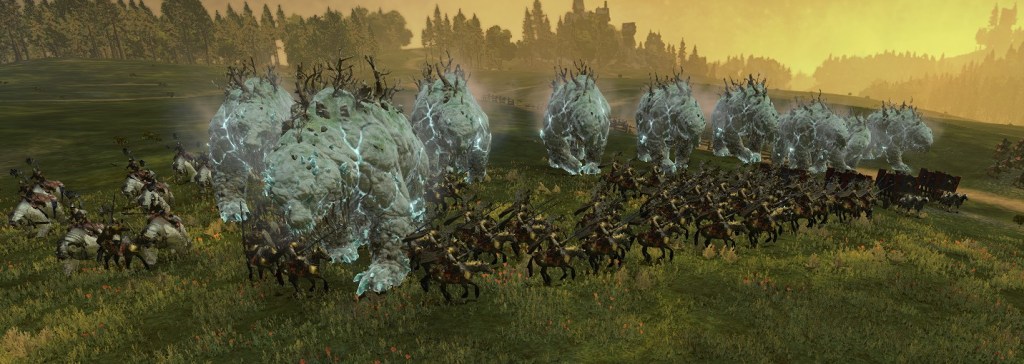
Be careful with this one! By now you’ve probably spent so many turns steamrolling the AI that you don’t even bother with scouting or spreading plagues anymore. That’s cool but keep a close eye out for when you creep close to Kislev’s territory, because some of the armies they send out can even defeat a 20-unit doomstack if you’re not careful.
By the time you get to them, they’ll have had time to fully upgrade their cities and recruit elite units, such as Elemental Bears. They’re not quite as difficult to deal with as Terracotta Sentinels individually, but there’ll probably be a lot more of them. They’re also a lot bigger, which would be great if you were playing as the Dark Elves or another faction with epic ranged units, but it actually seems to work to their advantage when they’re going against your hero spam. They’re so big it makes it very difficult to target Kostalyn, not only with melee attacks but also with Spirit Leach.
Even so, Kislev is unlikely to cost you the campaign at this point. By now you’ve probably conquered Cathay and loads of other territory. Even if Kostalyn does manage to wipe out your main army like he did mine (dang it), you can recover quickly. Just consider it a learning experience. Use the same Plague Cultist tactics you used to squeak out victories over Cathay: Agua to sap their health and then Palsy with symptoms to weaken them.
By now you should also have enough armies to take them on two-on-one, so definitely do that. Never try to take on Kislev in a fair fight.
Army Composition
Nurgle’s army composition is infamously limited (for now). This faction has a smaller roster than most and they’re quite a bit weaker. Starting out, Ku’gath can hold his own decently well with Nurgling spam and a few heroes, but you’re going to switch to single-entity units as quickly as you can. This makes the best use of Nurgle’s healing abilities. Not only that, single-entity units are still much more powerful than mobs, often at a much lower price.
Ku’gath Nurgling Spam
This will be how you start off and you’ll probably keep them late into the campaign. You still want a couple of single-entity units in there also: a Plagueridden with the Lore of Nurgle and another with the Lore of Death. You can put the Lore of Nurgle Plagueridden somewhere else once you start leveling up Ku’gath’s magic line, but that shouldn’t be a priority. Every army should have at least one Cultist of Nurgle for mobility and ideally you want an Exalted Hero of Nurgle. The rest of the army you can fill out with Nurglings. They’re not quite as good as some of your other mobs, but they’re a lot cheaper, especially with Ku’gath’s ability to reduce Nurgling upkeep. It also doesn’t matter if they die because before too long, Ku’gath can recruit them for free.
Hero Spam
Once you’ve got decent capacity for Exalted Heroes and Cultists, pretty much every army should be this. Your ideal setup should be:
Chaos Sorcerer Lord (Ideally with the Lore of Nurgle but you don’t have to get rid of your Lore of Death Sorcerer Lords)
Two Plagueriddens (One for each Lore)
A mix of Cultists and Exalted Heroes. A few Beasts of Nurgle will also work if you’re short on capacity, but they’re not as good as Cultists or Exalted Heroes.
You don’t have to get a full stack of these. A total of fifteen units will beat the snot out of nearly anything you have to deal with. In fact you can usually get by with ten, as long as you’re not up against any of those tanky legendary lords that Cathay or the Dwarfs have.
Chaos Warriors of Nurgle Spam
This is not as good as hero spam. A full stack is not as effective on the battlefield as a stack of 15 heroes, plus the Chaos Warriors of Nurgle are only a little bit less expensive than the hero units. But sooner or later you’re going to run out of hero capacity, so Chaos Warriors are a good way to go when Nurglings or Marauders just won’t get the job done.
It’s absolutely essential that you have some way of shutting down artillery units if you use this stack. If you have capacity for at least a few heroes, that would be best. If not, Nurgle does have a few fast-ish units on his roster, such as the Chaos Knights of Nurgle, Chaos Warhounds and Froggies.
You could also add a chariot or two, or put your lord on a chariot, which gives you some hammer-and-anvil options.
This same setup would work with Chosen of Nurgle, but Chosen spam is not advised. A few Chosen might go well with your Warrior spam, but a Chosen of Nurgle doomstack is not very efficient. They do have better stats than the Warriors, but not enough to make them worth the added expense.
Other Single Entity Spam

This also doesn’t work super well, but if you’re going to go this way, a mixed bag works best. A stack of Great Unclean Ones will die very quickly to skirmishers and/or artillery. Soul Grinders of Nurgle work much better as a doomstack, but they’re crazy expensive and you never get super rich as Nurgle. So it’s better to just add a few of these units.
The majority of your army will consist of Beasts of Nurgle (if you’re sticking to single entities), along with your lord and however many heroes you can get. You’re definitely going to want Lore of Nurgle on the lord, for Fleshy Abundance and Blight Boil.
Great Unclean Ones are good only if you’ve unlocked their bound spells, which don’t cost any Winds of Magic. Blight Boil has a very good range with them, so keep them as far away from the fighting as possible or else enemy archers will delete them in seconds. This is also an issue with Soul Grinders, but at least they can run away at a reasonable pace.
All and all, these non-hero single-entity units do not really make an effective doomstack (other than Soul Grinders, which aren’t really worth the expense). You’ll get much more value for your money if you mix a few of these units in with your Chaos Warriors of Nurgle spam.
Lords, Heroes and Mounts

Chaos Sorcerer Lords are definitely better than the Heralds of Nurgle. They’re basically like Exalted Heroes of Nurgle but with spellcasting ability. They’re very fast once you get them on a horse and very tanky; they do fine in the middle of globs of enemies (as long as it’s not something stupid tough like Slayers) and they’re small so only a few of these units can get close enough to swing at them.
Although you start off recruiting lords with the Lore of Death, Lore of Nurgle is a much better choice after you’ve dealt with the Mortis Engine. This allows your lord to cast area of effect and sometimes healing. (It’s usually best to give a couple of your Exalted Heroes the Locus of Fecundity ability for healing, since Fleshly Abundance costs a lot of winds, but Locus of Fecundity heals slower and restores less hp. So Fleshly Abundance is still useful if someone’s taking a lot of damage).
Cultists of Nurgle and Exalted Heroes of Nurgle are also very tanky with very good abilities. It’s good to give some of your heroes Acid Ichor to mix in with Locus of Fecundity, since Locus is area of effect with unlimited uses (although each unit has a limit to how much hp they can regenerate in a particular battle.)
The Lords, Exalted Heroes and Cultists are all best on their horses. Warshrines add a nice boost but they’re just too slow and present too big a target. Chariots might be situationally viable early on, when you’ve still got a mostly infantry-based army. You can make use of hammer-and-anvil tactics with your heroes, just like N’Kari, but that’s not going to be a very good tactic against most of your enemies early game. Chariots might be fast but they’re still a big target, and Cathay loves to spam archers.
Every army, no matter its composition, should also have at least two Plagueridden, one of each available lore. Even though your lord will have one of these lores, you’re probably going to want to spam some of those spells without having to wait on them to recharge.

Don’t be afraid to put your Plagueriddens on Rot Flies. That does make them big targets, but they take arrows surprisingly well as long as it’s just one or two units. You don’t want to just leave them sitting there, but you’ve got time to cast a spell and then fly out of the way.
The Plagueriddens with Rot Flies are also very decent in melee. They’re not quite as tanky as your Exalted Heroes, but you can bring them into help if your Heroes, Cultists and lord are getting too badly hurt.
They also have two abilities which your Exalted Heroes do not: Locus of Contagion and Locus of Virulence (in addition to Locus of Fecundity, which your heroes do have). You’ll want to go with Locus of Contagion for the area-of-effect damage. Your Heroes and Cultists have got you covered in terms of healing and stat boosts.
For more nerd news, follow The Southern Nerd on Facebook, Pinterest and Patreon.

1 Comment