
By Joshua Waddles
25 Jan 2026
Turn 1 Buffs
The movement portion of Turn-1 can get rather complicated depending on which strategy you wish to use, so we’ll start with the infrastructure, research and Dance selections.
For dance I went with The Burning Bacchanal for replenishment. Early replenishment is the option I’d choose first on almost any playthrough, especially with mob-heavy armies that don’t wear armor. As for research I chose The Prince’s Protection, which gives added physical resistance for Daemonic units. The Masque already gives 15% physical resistance for Daemonettes, but they don’t wear armor so another 5% is a good thing.
It’s important to note, however, The Masque’s buffs on Daemonettes are only for her army and not factionwide. Your other lords are going to rely on the more standard Slaanesh stacks such as Chaos Warriors and Chosen, or single-entity stacks if you can get your growth high enough.
As for Unholy Manifestation, the only one available right now is Pain for Pleasure for added campaign range. All units take 6% damage when this is used, so it’s best saved for an end turn with your army garrisoned if they’re not too beat up already.
Turn 1 Buildings
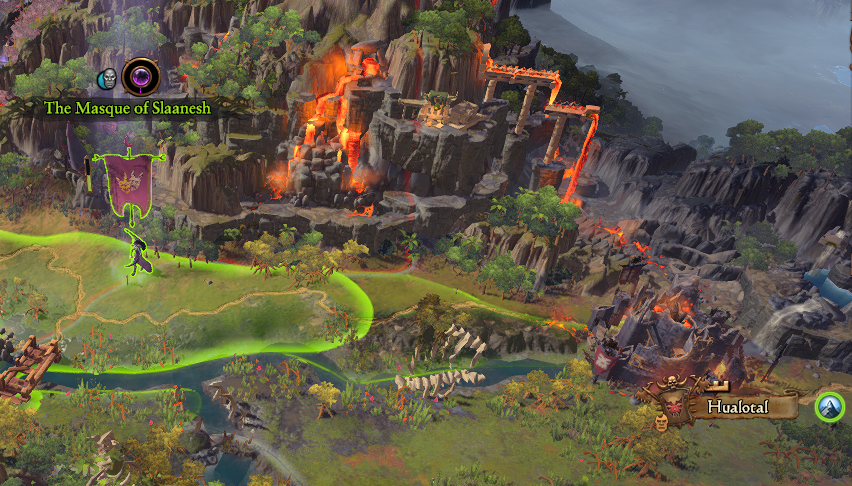
Your main settlement is on an island. You’ll notice that it has a Shrine of Decadence. This is useless. For starters it’s a tier 3 max building, meaning it belongs in a minor settlement. And at level 1 it’s useless either way because the unit you’d want to recruit from this building, Daemonettes, can be recruited from any Daemonic main settlement building without the need of a military building. So tear it down and build yourself a nice shiny Cult of Pleasure. You’re going to want those cultists soon, even if you’re not spamming them like you would with other factions.

You also two cults already established, one in Goressel and one in Karak Azul. The only useful building will be the Devotee Enticement for +2 Devotees per turn. You might also add Words of Temptation for increased corruption (which increases devotee output once corruption reaches 50%) but this increases discoverability and, at 1,000 favor, is rather expensive at this stage of the game.)
In these cults you also have the option of building The Acolyte Trials, the start of a chain which will eventually grant you a special unit which can establish a special cult with a Cult Magus Chambers. It’s a pretty nifty building. It gives you 10% of the host settlement’s income, adds +1 Cultist Capacity and +1 Lord Recruit Rank factionwide. But it takes 10 turns for the Acolyte Trials to produce this unit and until then it requires an additional upkeep of 300 favor per turn. I personally don’t think this building is worth it.
Turn 1 Fighting
As for your first battle, you have two options: Non-aggression pacts to the south so you can push North or take out Skulltaker. The first an easiest option is to open diplomacy with Skulltaker and Rakarth.
On Turn 1 you can get non-aggression with both of them for less than 1,000 favor each if you join war against the NPC faction they’re up against. This is highly recommended as it secures your Southern border and makes you friendly with your most dangerous adversary, Skulltaker. The drawback is that Skulltaker tends to steamroll and you’ll have to move fast to take the territories from Yuan Bo Markus Wolfheart, or else Skulltaker is going to start taking some of these cities as soon as he finishes mopping up Clan Helhein and Desciples of Change.
If you do want to take out Skulltaker, you’re going to have to move fast before he recruits another army. Take out The Blood Hall Coven’s starting army for now but ignore Pillars of the Unseen Constellation.
Move The Masque to the very edge of the border on The Blood Hall Coven’s side, NOT Skulltaker’s side, and add your Alluress to the army. You’ll notice that you now have the ability to summon a disciple army. This may make the fight slightly easier but you can manage without it.
Either way, move The Masque as close to Hualotal as she can get without going into forced march. Skulltaker will ignore the Oracles of Tzeentch and attack you during the end turn. This is your best shot because it’s pretty much the weakest Skulltaker is ever going to be.
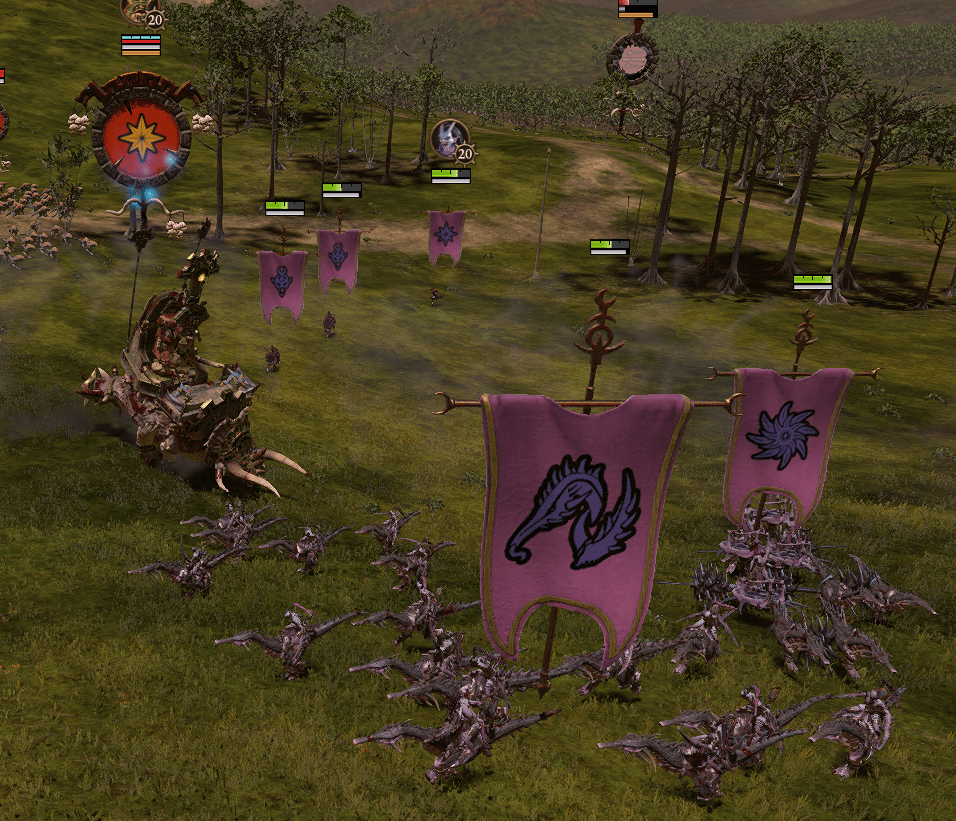
For the battle with Skulltaker, move your single-entity units and infantry up onto the hill behind the woods and pull your fast units (your chariots and cavalry) off to the side to harass Skulltaker’s flanks. Try to divide his forces so that they don’t attack you all at once. If you’re lucky, or sneaky, you can isolate Skulltaker and dogpile your Daemonettes on top of him. As you see in the video I did lose a unit of Daemonettes in this battle, which is annoying so early in the game but not a huge issue. Daemonettes are very replaceable and cost far less than a non-aggression pact.
As for taking Hualotal, the strategy is very simple. You just cheat. Start the battle with all of your forces on one side of the city, then run along the edges of the map to get to an undefended gate. From that point you just rush in, take the Key Building and Victory Location, and just hold the garrison off until the timer runs out. This same strategy works if you just want to wipe out the garrison, since the defenders split up in all different directions making it easily to isolate units and overwhelm them with numbers.
If you DO decide to be friends with Skulltaker and decide to just take on The Blood Hall Coven, the battle couldn’t be more simple. Just use your fast units to shut down their skirmishers and make use of the trees to block their missiles.
Make sure at least one of the settlements in any province you conquer is a Daemonic settlement so you can recruit Daemonettes over the end turn.
Leveling Up
For leveling up, I’d recommend starting with the blue line for The Masque. At least for a start. The red line will buff her Daemonettes early, but your bigger issue right now is money, so start with Rout Marcher, Serve or Die (with the fourth point put into either Slaves of Excess or Corruption), Draftmaster, Drawn to Decadence (with the fourth point put into Relentless Advance) and lastly Renowned and Feared.
The Masque’s unique skills don’t unlock until Level 12 anyway.
For your Alluress, you’ll want to max out Lash of Slaanesh and then just put points into the purple line until you can unlock Slicing Shards. I’d recommend Blissful Rapture for buffs and Pavane of Slaanesh for damage (Save Pavane of Slaanesh for missile units because it causes them to go into Rampage after a short amount of time.)
When you do get your Cultist, start with Increased Mobility then Rapid Ruination, then focus on mobility and defense until Mistress of Disciples unlocks. Once gate of Slaanesh unlocks, obviously max that out for your summons.
Mopping up The Blood Hall Coven (and possibly the Apostles of Change)
If you elected to take out Skulltaker and you’ve already occupied Hualotal, you’re going to have to move fast to take over conquer The Apostles of Change. Their territories are rather spread out, but if you hustle you can take them and get back to Pillars of the Unseen Constellation just in time to meet The Blood Hall Coven’s new army before it attacks Blood Hall. They’ll be spamming Darkshards, so cheat your purple/pink head off and use those trees.
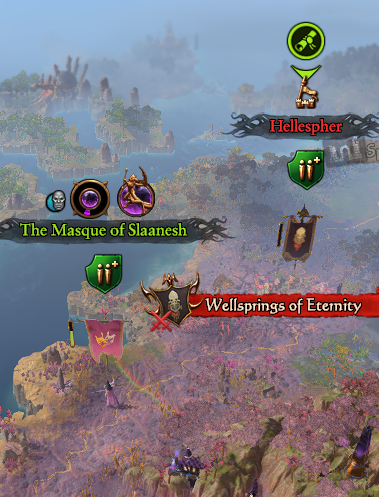
After taking Wellsprings of Eternity, you’ll have the option to subjugate The Blood Hall Coven. The vassal system in this game is so broken that it kind of makes the game too easy in my opinion, but in this case it’s an NPC faction with just a minor settlement. It’s lore friendly that Slaanesh would have Druchi vassals and you eventually get some allied ranged units to recruit.
While you’re handling business with these NPC factions you should also be filling The Masque’s army with Daemonettes and the cultist one your Cult of Pleasure building finishes. During this time you should probably also get yourself a Chaos Sorcerer Lord. I recommend Lore of Shadows because Penumbral Pendulum is devastating in the early game.
Don’t neglect growth but prioritize money in your infrastructure. You’re going to want a lot of single-entity units, the capacity for which gets increased with level-4 but you have more immediate concerns. If you didn’t make friends with Skulltaker, you’re going to need a fully-functional second army pretty soon to deal with rivals encroaching upon your Southern border.
Markus Wulfhart
After you’ve beaten The Blood Hall Coven, Markus is your next big rival and he doesn’t like you very much at all. If you can get him to garrison at Spektazuma, you can defeat him with the same tactics advised for taking Hualotal: just use your speed to steal the Key Building and Victory Point, then hold the humans back until the timer runs out. Utilize Lash of Slaanesh to disrupt enemy skirmishers, not to mention globbed up mobs packed into the narrow pathways.
If you must fight Markus in the open field, use your speed and the trees. Marcus likes to spam missile units, which would be devastating for a Daemonette army in any place except Lustria. So use his advantage against him. The trees will block most of the ranged attacks and even better, the skirmisher units often rush into melee when they can’t get a clear shot.
If you feel you’ve bitten off more than you can chew, use your chariots to draw off portions of his army so you don’t have to fight them all at once.
Keep building money and growth buildings while you take his last two cities. Expect him to have at least two armies, but both of them together still shouldn’t be as dangerous as Marcus Wolfheart’s main army. Especially since The Masque’s Daemonette army is so fast, it allows the use of one of my favorite tactics in dealing with reinforcements: Just rush your army to the edge of the map where the reinforcements are coming from. With your entire army lined up, and pressing the edge of the map, the reinforcements can only come a few units at a time. This is even more fun with range-heavy armies, which is what this faction likes to recruit.
Markusis done now and it’s time to deal with The Jade Custodians, but keep an eye on your rear! If you eliminated Skulltaker it’s likely there are some rivals coming to power near your Southern Flanks: The Awakened, The Cult of Sotek and possibly The Thousand Maws if you didn’t make friends with Rakarth. If you can’t get non-aggression with anyone coming near, it might be time to send that second army South and let The Masque deal with Yuan Bo on her own.
The Jade Custodians

Depending on how fast you got there, Yuan Bo might still be up North mopping up The Blue Vipers. This is an excellent opportunity to take some of his undefended settlements. You may even be able to take his provincial capital and cut off his recruitment capability, but this would require wasting a few turns and marching past vulnerable minor settlements.
In any event, use the same tactics against Yuan Bo as you did against Markus Wulfhart. Yuan Bo’s single-entity units are rather dangerous, so keep them boggled down under Daemonettes while your single-entity units beat them down. Keep an eye on your single-entity units and pull them back if they’re taking too much damage. As always, utilize the trees and use your fast units to shut down enemy skirmishers.
Lizardmen

After you take out The Jade Custodians, your next most likely enemy is Mazdamundi. You also have Lizardmen factions to the south, including Itza and Cult of Sotek.
The lizards can potentially be very dangerous to your campaign, depending on how many single-entity units they’ve got and also their Slann Mage-Priests.
Depending on how fast you hit Mazdamundi, he might not have his really devastating spells unlocked just yet. But even early on he’s still got some bound spells you’ve got to watch out for. By now you should have two Cultists in addition to your Lord and spellcaster. It’s recommended that you use your fast units to divide the army, isolate Mazdamundi and take him out with your cultists before reinforcements can arrive.
Use similar tactics to isolate and take out the Ark of Sotek Bastiladon for the Hexoatl faction.
You’ll be fighting the other Lizardmen factions a little later so you’ll hopefully be better prepared, but your main army might still be tied up in the north by the time this happens. In this case, spread your front line thin and try to lure their spellcaster away from your front line.
The Dark Elves
Since you’ve already been at war with Markus Wulfhart and Yuan Bo, it shouldn’t be too hard to convince Morathi to be your friend. It’s highly recommended you get a non-aggression pact with Morathi to secure your Northern border, freeing you to send The Masque down south.
If you want Morathi as a vassal or if you just want her territory, you won’t find The Cult of Pleasure to be too much of a challenge. Depending on how much damage she’s taken from her own enemies, you can probably autoresolve through that little war. If not, just beware of skirmishers. Use Lash of Slaanesh to disrupt her Darkshards and any Shades she might have, and use your fast units to shut them down.
The Vampire Coast
These factions are so helpless against Slaanesh it’s barely even worth mentioning. Daemonnettes run circles around even normal infantry, let alone slowpoke zombies.
What might give you an issue is their monster units and/or spellcasters. But they won’t give you any more trouble than the lizards.
Unless you fight them so late in the game that they have Necrofex Colossi. In this case hide in any trees available while you flank and try to isolate the big guy, then take him out with your single-entity units.
Staff of Masks Quest Battle
The main use of the Staff of Masks is it’s 5 percent reduction in physical resistance for enemy armies. Not huge, but the quest battle is rather easy.
The goal of this battle is to protect the three NPC Alluresses while Nurgle mobs come at you in waves from random directions. As soon as you defeat one wave, enemy reinforcements come from another direction trying to flank you. It’s honestly hilarious because it’s Nurgle. They’re almost as slow as The Vampire Coast and you’ve got all the time in the world to reposition your front line before they get there.
You have an allied army with lots of skirmisher units. Unfortunately they don’t do anything until after the mid-battle cutscene. Until then they’re pretty much just there for decoration. That’s fine, though. Because your Daemonettes waste pretty much everything Nurgle sends at you.
